- 609
User Enablement Workflow Using n8n
Streamline user onboarding with automated processes, detailed analytics, and seamless integration in this n8n template.
Streamline user onboarding with automated processes, detailed analytics, and seamless integration in this n8n template.
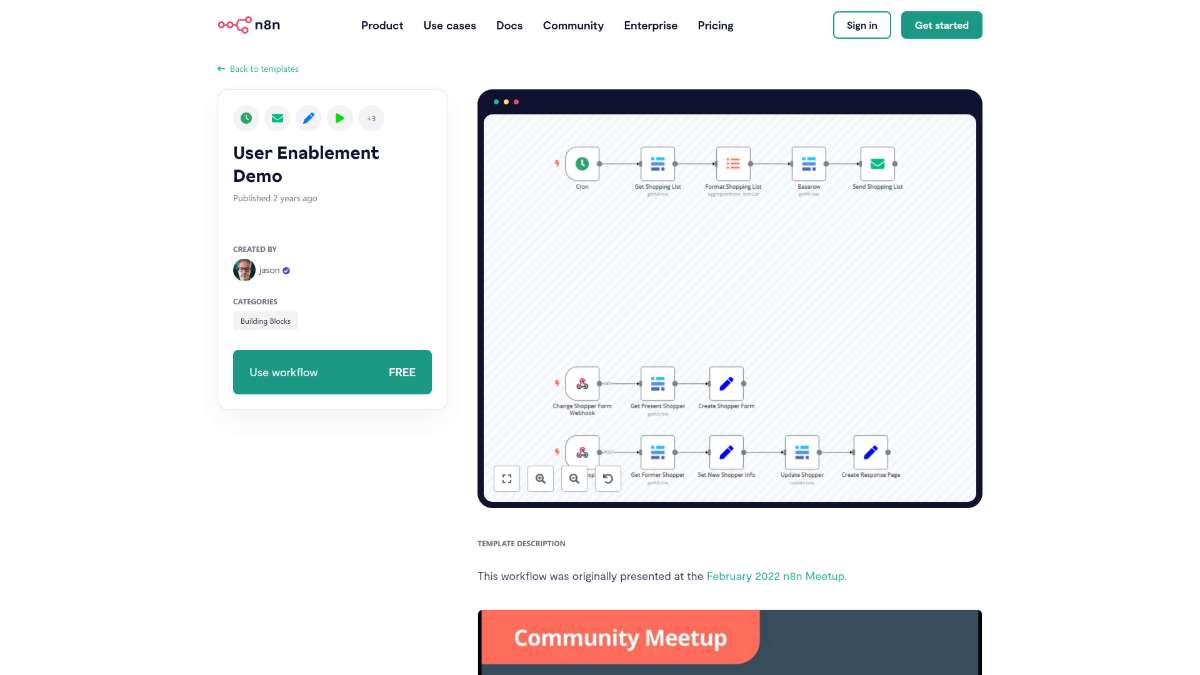
Who is this workflow for? The User Enablement Workflow Demo facilitates end-users in configuring and managing their own workflows seamlessly. Originally showcased at the February 2022 n8n Meetup, this template leverages n8n automation to streamline task management and communication processes..
To implement this workflow, ensure the following prerequisites are met:
Baserow Account:
Create a Baserow account and set up a group named User Empowerment Demo.
Within this group, establish a Office Shopping List database.
Add two tables:
Email Account:
Configure an email account dedicated to sending out alerts and notifications.
To tailor this workflow to your specific needs, perform the following customizations:
Baserow Nodes:
Update all Baserow nodes with your credentials, selecting the appropriate databases, tables, and fields.
Send Shopping List Node:
Configure this node with your email credentials and specify the recipient email addresses.
Create Shopper Form Set Node:
Modify the HTML code within the value field to reference your production URL from the Submit Shopper node. Refer to the instructions below for changing the webhook URL.
Cron Node:
Adjust the scheduling settings to match your desired timing for automated tasks and alerts.
Customizing the webform allows you to tailor the user interface to your preferences. Follow these steps to modify the form:
Two nodes control the webform’s appearance and behavior:
<form action="https://tephlon.app.n8n.cloud/webhook/submit-shopper" method="POST">https://tephlon.app.n8n.cloud/webhook/submit-shopper with your production webhook URL.To update the image displayed in the webform:
background-image: in the HTML value.background-image: line with the new CSS background source.This workflow integrates with various services to enhance its functionality:
Ensure each integration is properly configured to maximize the workflow’s capabilities.
This workflow is ideal for:
The User Enablement Workflow Demo empowers users to autonomously manage and configure their workflows using n8n and Baserow. By automating task distribution and communication, it enhances efficiency and ensures that essential processes are handled smoothly and reliably.
Streamline accounting by automating invoice retrieval from Xero. Save time with seamless integration and efficient data processing in n8n.
Automate the delivery of financial metrics to Mattermost monthly. Streamline reporting with seamless integration and reliable data transfer.
Streamline tasks by integrating Notion and iOS Shortcuts for efficient time tracking with this n8n template. Enhance productivity and manage time effectively.
Help us find the best n8n templates
A curated directory of the best n8n templates for workflow automations.